

Quick Answer
P0366 means Camshaft Position Sensor B Circuit Range/Performance, Bank 1. Confirm the full manufacturer description and the VIN-specific identity of sensor B. It does not prove the sensor is bad or that the timing chain has stretched. Save the complete scan report, identify the correct sensor, and evaluate supply, return, signal, and timing evidence in the prescribed order.
What Does the P0366 Code Mean?
The P0366 code indicates that the controller found the designated camshaft-position signal outside its expected performance or pattern criteria. Range/performance is not the same monitor result as a signal held low or high. The controller’s conclusion can involve signal quality or plausibility under specified operating conditions.
Bank 1 is the cylinder bank containing cylinder 1. Sensor B must be identified from the engine’s service information. It often refers to an exhaust camshaft sensor, but do not choose a location or replacement part from that convention alone. Engine layout, connector views, and component labels take priority.
The signal path includes the sensor, its electrical supply and return, connectors, wiring, and the rotating target being observed. Mechanical timing and variable-valve timing can also affect the relationship being evaluated. A code naming a sensor is not sufficient evidence to choose between an electrical defect and a mechanical problem.
GM PIP5883 covers connector checks on specified Malibu 1.5L LFV vehicles. Volkswagen’s Passat book distinguishes B-sensor performance, low, and high faults. Use current VIN-specific diagnostics.
P0366 versus circuit, intermittent, and correlation faults
| Code | General description | Key distinction |
|---|---|---|
| P0366 | Sensor B range/performance, Bank 1 | Check signal quality and the OEM plausibility criteria. |
| P0365 / P0367 / P0368 | Sensor B circuit / low / high, Bank 1 | Use the corresponding electrical test branch. |
| P0369 | Sensor B intermittent, Bank 1 | Capture the dropout and its conditions rather than guessing a cause. |
| P0016 | Crank/cam correlation, Bank 1 Sensor A | A different sensor/correlation designation; confirm all identities. |
A normal static voltage does not prove a clean camshaft waveform. A waveform problem also does not automatically prove mechanical timing error; check circuit condition and the correct known-good reference.
P0366 Symptoms and Likely Causes
Symptoms vary with the engine’s fallback strategy and whether the fault is current. Record the exact starting, running, and temperature conditions. A stored historical P0366 with normal operation is different from an engine that stalls or produces abnormal mechanical noise.
Save the fault status and available failure records. The warning alone does not identify a failed part.
An unreliable position input can affect synchronization on some engines. Other starting faults still need the correct checks.
Compare the complaint with companion faults and operating data. Do not assign every drivability issue to one sensor code.
Heat, movement, or connector contact may expose a defect absent during a stationary cold test. Capture the original conditions safely.
Practical cause-checking order
- Connector or harness condition: Inspect oil or water entry, damaged seals, terminal grip, crimp integrity, locks, and harness contact with hot or moving parts. A recently disturbed connector deserves inspection without assuming it is the confirmed cause.
- Supply, return, or signal-circuit problem: Check the exact sensor design and electrical path. Shared supply trouble, a poor return, or an intermittent signal conductor can compromise a healthy sensor’s output.
- Sensor or rotating-target defect: Internal sensor failure, target damage, incorrect seating, or an incompatible replacement can affect the waveform. Use the specified tests and component identity to separate these possibilities.
- Cam timing or control problem: Mechanical timing, a target relationship, or variable-valve timing behavior may be relevant when supported by companion codes and waveform evidence. Do not infer a stretched chain from P0366 alone.
- Controller or application-specific issue: Consider module faults or applicable service guidance only after required external tests. A clean connector appearance, code erase, or generic relearn menu cannot substitute for the diagnostic evidence.
Do not apply a universal sensor resistance, signal amplitude, air gap, or timing-angle limit. Active and passive sensing designs require different procedures and instruments.
How Serious Is P0366, and Can You Drive?
With normal operation and a steady MIL, arrange prompt diagnosis and follow the owner’s manual. The code alone does not prove that mechanical timing has failed or that immediate engine damage is inevitable. However, unexpected starting or stalling problems require a more urgent response.
Do not continue an ordinary road test if the engine loses power unpredictably, misfires severely, or makes abnormal mechanical noise. A separate oil-pressure, overheating, or timing-related warning takes priority. Choose recovery when reliable operation cannot be established.
Stop and arrange a tow Stop safely for stalling, unsafe power loss, a flashing MIL with severe misfire, abnormal mechanical noise, low oil pressure, overheating, smoke, or leakage. Do not run an engine with suspected mechanical interference simply to collect more data.
Keep probes and cables away from belts, fans, and hot exhaust. Use appropriate back-probing equipment to protect terminals. Follow shutdown and power-isolation instructions before disconnecting components or performing resistance tests. Mechanical timing inspection and scope testing around a running engine require suitable training and safe access.
How to Diagnose P0366 in the Right Order
-
Save the complete P0366 record and operating conditions
Record VIN, engine code, controller identity, complete fault wording, status, and available freeze-frame information. Save companion sensor, reference-supply, crankshaft, timing, and oil-control faults before clearing anything. Note cold versus hot behavior, cranking versus running, and whether the fault follows recent sensor or timing work.
Distinguish the original fault from codes introduced during intentional disconnection. A historical event can help identify intermittent conditions even when the current scan is clean. Do not erase the evidence before establishing which bank and sensor the manufacturer actually identifies.
-
Identify sensor B and its electrical design
Use the component-location diagram, connector view, and parts information for the exact engine. Confirm Bank 1 and sensor B without relying on an internet photo from a similar vehicle. Check whether the sensor is active or passive and identify its supply, return, and signal terminals as applicable.
If a replacement was recently fitted, verify part number, seating, connector compatibility, and the specified mounting arrangement. Similar physical fit does not guarantee the correct signal behavior. Identify the rotating target and any required installation or relearn procedure before deciding what further testing is needed.
-
Inspect connections and prove supply and return
Inspect the complete accessible harness route and the correct connector. Check contamination, terminal retention, crimps, locks, seals, chafing, and heat damage. A connector that looks clean can still have poor contact. Document the condition before movement changes an intermittent fault.
Perform the specified supply, return, and circuit tests under the correct operating state. Compare with VIN-specific requirements. Shared reference faults need their own diagnostic branch. Do not inject battery voltage into a signal pin or assume a resistance measurement is appropriate for every camshaft sensor.
-
Capture the signal during the actual failure
Review supported synchronization or cam-position data, then use a suitable oscilloscope when required to assess waveform quality. A slow scan-data update may miss a brief interruption. Capture the signal during the safe conditions associated with the complaint, such as cranking or the relevant warm operating state.
Check for missing or irregular transitions using the correct sensor design and known-good reference for the engine. Where the OEM method permits it, compare the signal near the sensor and at the controller to localize a wiring problem. Avoid using a waveform from a different engine as a universal timing template.
-
Separate electrical faults from mechanical timing evidence
If the electrical signal is reliable but its relationship is wrong, follow the manufacturer’s crank/cam correlation and timing-control checks. Review companion faults, oil condition and specification, requested versus actual cam behavior where available, and the relevant mechanical information. Those are evidence branches, not automatic reasons to replace a timing set.
Inspect the target, mounting, and mechanical timing only as the diagnostic sequence directs. A performance code does not establish which part is physically misaligned. Stop running the engine if noise, pressure warnings, or other evidence suggests mechanical risk. A generic cleaning or reset routine cannot correct a proven mechanical defect.
-
Repair the confirmed defect and verify synchronization
Repair the proven terminal, wiring, supply, sensor, target, or timing-control defect using the specified parts and methods. Confirm mounting instructions and any required setup or relearn for the exact engine. Do not perform an unrelated adaptation merely because a scan tool offers it.
Restore all connections and harness protection, then repeat the original safe failure conditions. Compare the relevant data and waveform evidence with the pre-repair record. Clear erasable faults only after saving evidence and completing the repair. Check current and pending status and the relevant monitor rather than declaring success immediately after clearing.
Specifications are vehicle-specific. Use the exact sensor type, terminal assignments, waveform reference, supply/return limits, timing criteria, and setup conditions from current OEM information. No universal voltage, resistance, angle, gap, or cleaning interval is supplied here.
P0366 Repairs and Cost Factors
A sensor replacement is appropriate only when testing identifies the sensor as faulty. A connector or harness defect needs a durable electrical repair; a damaged target or timing-control problem needs the corresponding mechanical procedure. Keep the failed measurement and the repair decision linked in the estimate.
Routine sensor cleaning is not a universal preventive repair for P0366. Follow the component’s approved handling and inspection instructions. If oil contamination or another underlying condition caused damage, address that source. Do not assume every camshaft replacement, battery disconnect, or code erase requires the same relearn.
| Possible path | US quote requirements |
|---|---|
| Signal and circuit diagnosis | Include exact sensor identification, supply/return checks, and intermittent waveform testing. |
| Connector or harness repair | Quote approved terminals, seals, access, and restored routing. |
| Confirmed sensor replacement | Specify the correct part, mounting work, and any required setup. |
| Timing or target repair | Require the evidence proving a mechanical defect and the exact repair scope. |
Obtain a local written quote after diagnosis. Sensor access, intermittent testing, target location, and mechanical work can create very different costs. Ask for separate diagnosis, parts, labor, taxes, setup, and verification. Compare quotes for the same proven defect, not a generic “camshaft code repair.”
Using iCarsoft CR Eagle for P0366
The official iCarsoft CR Eagle page lists all-system diagnostics and bidirectional functions. Confirm the exact engine, ECU, relevant PIDs, and any required test or relearn before purchase. Broad capability does not establish every VIN-specific camshaft operation or programming function.
Use available scan information to choose and document the next test. Compare requested and actual cam data only when the ECU exposes meaningful channels and the OEM procedure explains them. A signal dropout may require scope capture even when live scan data appears stable. Retain before-and-after evidence.
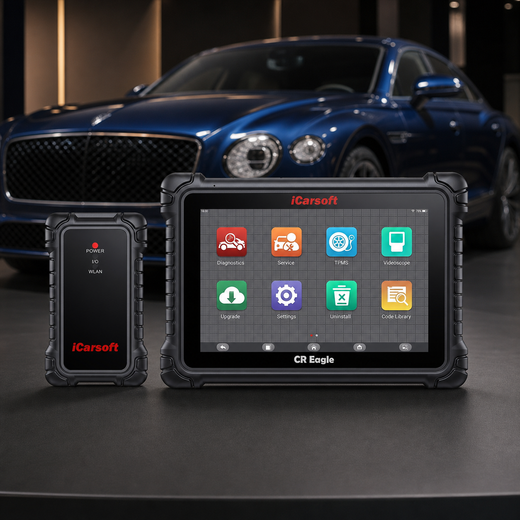
Save evidence before choosing a repair
iCarsoft CR Eagle
On a supported vehicle, the CR Eagle helps save the complete fault context and review relevant camshaft or synchronization data before physical testing.
Check current CR Eagle price and availabilityCheck CR Eagle compatibility by VINDo not advertise a universal camshaft reset, sensor cleaning, or ECU flash as the fix. Use a supported special function only when current vehicle instructions require it. The scanner does not replace a scope, electrical measurements, or a mechanical timing inspection.
Know the measurement boundary. Physical voltage, resistance, signal waveform, terminal tension, target condition, oil pressure, and mechanical timing require the correct external instruments and inspection. Supported scan data supplies controller evidence alongside those tests.
Verify the P0366 Repair
Repeat the safe conditions that originally set the fault and confirm the affected signal and synchronization remain correct. Recheck connector locks, harness routing, and any required setup. Save the final scan and, when used, waveform records so the result can be compared with the original failure.
Follow the OEM clearing and verification sequence. Check current and pending faults, readiness, and relevant monitor results as supported. A permanent emissions DTC cannot be forced away with a scanner or battery disconnect; the vehicle removes it after its own qualifying monitor requirements are met.
A permanent P0366 can remain immediately after a successful repair. If the vehicle stores it as a permanent DTC, a scan tool or battery disconnect cannot erase it. Once current and pending faults are absent, the OBD system removes the permanent record only after the applicable monitor reruns and passes.
Related camshaft signal and timing Code Guides
P0366 Frequently Asked Questions
Does P0366 mean the camshaft sensor is bad?
No. The sensor’s supply, return, wiring, connector, target, and relevant timing relationship can affect performance. Prove the failed section before replacing parts.
Where is sensor B on Bank 1?
Bank 1 contains cylinder 1. Identify sensor B from the exact engine’s service information; do not choose a sensor or side from a generic photo or convention alone.
Is P0366 the same as P0369?
No. P0366 is the range/performance branch, while P0369 describes an intermittent B-sensor fault on Bank 1. Save the complete code and follow its specific diagnostic criteria.
Does a normal voltage prove the signal is good?
No. A static reading can miss missing or irregular transitions. Use the correct waveform or functional test during the actual failure conditions when the procedure requires it.
Does P0366 prove the timing chain is stretched?
No. Mechanical timing is one possible evidence branch. Establish sensor and circuit condition and follow the engine-specific correlation checks before authorizing timing repairs.
Will cleaning or resetting the sensor prevent the code?
There is no universal cleaning or reset repair. Fix the proven cause, complete only the required setup, and verify the signal and monitor under the original safe conditions.
Technical references
- GM PIP5883 — October 6, 2022; specified Malibu 1.5L LFV connector checks
- Volkswagen Passat Quick Reference Specification Book — February 2014; B-sensor DTC distinctions
Product information: Official iCarsoft CR Eagle page.
Editorial note: Use current manufacturer instructions for your VIN and qualified help for work beyond your training. A code identifies a test result, not a confirmed failed part.


