

 By iCarsoft Official Store Technical Team, Automotive Diagnostics Editors · Updated August 31, 2026 · OEM technical references checked
Quick Answer
The P0142 code identifies an oxygen-sensor circuit fault for Bank 1 Sensor 3. It does not prove the sensor itself failed or identify a universal mounting position. Save the fault record, locate the correct sensor from the VIN-specific exhaust diagram, and test the signal, connections, supporting heater operation, and relevant engine conditions before choosing a repair.
1What Does the P0142 Code Mean?
P0142 is an oxygen-sensor circuit fault assigned to Bank 1 Sensor 3. Bank 1 is the cylinder bank containing cylinder 1. Sensor 3 identifies the third numbered sensor in that bank's applicable exhaust-sensor arrangement. Neither designation establishes a universal driver-side location or a part number without the vehicle's diagram.
The third sensor may be associated with an exhaust layout containing more than one catalyst or monitoring location. Do not count visible sensors casually or assume the farthest rearward plug must be correct. Confirm the engine, emissions package, connector identity, and manufacturer's naming before disconnecting or ordering anything.
The circuit designation identifies a monitored result, not a guaranteed defective sensing element. Wiring damage, terminal problems, signal or reference-path faults, and relevant operating conditions can affect what the controller sees. The heater has a separate role and may have its own code, even though it helps the sensor operate correctly.
Volkswagen's February 2014 Jetta/GLI specification book lists P0142 separately from low voltage, high voltage, slow response, no activity, and heater-circuit faults for Bank 1 Sensor 3. This code family is useful for choosing the correct diagnostic branch, but the book's application-specific values must not be transferred to another engine.
Keep sensor 3 signal and heater faults separate
| Code | General description | Key distinction |
|---|---|---|
| P0142 | O2 sensor circuit, Bank 1 Sensor 3 | General circuit diagnosis for the identified sensor. |
| P0143 | O2 sensor circuit low voltage, Bank 1 Sensor 3 | A specific low-signal classification, not interchangeable with P0142. |
| P0144 | O2 sensor circuit high voltage, Bank 1 Sensor 3 | A high-signal classification that needs its own circuit interpretation. |
| P0147 | O2 sensor heater circuit, Bank 1 Sensor 3 | The heater circuit is distinct from the oxygen-sensing signal path. |
Identify the sensor technology. A conventional oxygen sensor and a wideband air/fuel sensor do not use interchangeable test methods. Confirm signal definitions, references, heater design, and expected operating state before interpreting a voltage or applying an external instrument.
2P0142 Symptoms and Likely Causes
The engine may run normally with P0142, particularly when the affected sensor mainly supports aftertreatment monitoring. If there is rough running or poor fuel economy, diagnose those observations alongside the code rather than assuming that the rear sensor must be the cause.
The warning can be present without an obvious change in idle or acceleration.
The identified signal may look fixed or implausible, but the sensor's warm-up state and PID definition must be established first.
A relevant monitor may not finish while a circuit or prerequisite fault remains; clearing codes is not a readiness repair.
Misfire, mixture, heater, or other oxygen-sensor codes can change the diagnostic priority and explain the operating conditions.
Practical cause-checking order
- Connector and harness damage: heat, abrasion, road debris, moisture, poor terminal fit, or wiring disturbed during exhaust work should be inspected early.
- Signal and reference paths: check the correct sensor circuits and controller connections, including any shared fault shown by the wiring diagram.
- Supporting heater concerns: diagnose a relevant heater fault using its own procedure; do not apply heater resistance tests to the sensing circuit.
- Exhaust or engine conditions: assess leakage, misfire, mixture faults, or contamination when supporting evidence shows they could affect sensor behavior.
- Sensor, installation, or controller: verify the correct part and pinout, then condemn a sensing element or module only when the appropriate tests support it.
After oxygen-sensor or exhaust service: recheck connector identity, cable routing, clip installation, part application, and any universal-sensor splice. Similar plugs and wire colors do not guarantee matching circuits. A replacement part can be intact yet unsuitable for the engine's emissions configuration.
3How Serious Is P0142, and Can You Drive?
Arrange diagnosis rather than leaving the warning uninvestigated. A short light-load trip may be reasonable if the engine operates normally and the owner's manual permits it. Do not infer a guaranteed safe distance from P0142. Additional symptoms or warnings may make the situation more urgent than the sensor-circuit label suggests.
Keep severe misfire and rich-running evidence separate from a simple warning-light complaint. Unburned fuel can create dangerous exhaust heat, and a sensor code does not explain away a flashing MIL. Avoid intentionally creating mixture extremes to test response unless a qualified technician follows the exact approved procedure.
Stop and arrange a tow for a flashing MIL, severe misfire, repeated stalling, unsafe power loss, overheating, fuel leakage, smoke, or an unusually hot or glowing exhaust component. Follow the owner's manual and arrange appropriate assistance. Do not continue driving merely to see whether the sensor monitor eventually completes.
Oxygen sensors and exhaust pipes can cause burns long after shutdown. Let the system cool, support the vehicle correctly, and keep away from moving fans and belts. Never touch or pierce an unidentified signal wire, short a sensor terminal to battery voltage, or work beneath a vehicle supported only by a jack.
4How to Diagnose P0142 in the Right Order
-
Save the complete oxygen-sensor fault record
Record P0142 wording, status, suffix, freeze frame, and all companion codes before clearing. Save supported sensor and heater data, coolant temperature, engine load, and fuel-trim information where relevant. Note whether the warning followed exhaust work, a sensor replacement, a water event, or another engine problem.
-
Identify Bank 1 Sensor 3 from the diagram
Use VIN-specific service information and the emissions configuration to locate cylinder 1, the correct exhaust branch, and sensor 3. Confirm connector views, signal technology, heater connections, and expected test state. Verify that the scanner's label matches the OEM component before disconnecting a sensor or comparing it with another bank.
-
Inspect cooled wiring, terminals, and exhaust joints
Check connector locks, seals, terminal retention, harness clips, and clearance from the exhaust. Look for melted insulation, chafing, splices, moisture, or damage from recent work. Inspect relevant exhaust joints for evidence of leakage. Do not pull on the sensor lead, contaminate connector cavities, or attempt to clean a sensing element with unapproved chemicals.
-
Prove the signal and supporting electrical paths
Follow OEM procedures for signal, reference, ground, and heater-supply checks. Use a suitable high-impedance meter or scope and approved probes. Isolate power before any specified resistance measurement. Keep heater tests separate from sensing-electrode tests; the wrong test current or voltage can damage electronics or invalidate the result.
-
Compare supported data under valid operating conditions
Observe the correct sensor after its prerequisites are met and compare it with relevant engine conditions and companion sensors only as instructed. A post-catalyst signal need not mimic an upstream waveform. Determine whether the displayed parameter is voltage, current, equivalence ratio, or a calculated value before interpreting its direction or activity.
-
Confirm the failed component and installation requirements
Repair a demonstrated wire, terminal, reference, heater, or exhaust fault before replacing the sensor. If replacement is justified, use the correct application and installation specification, protect the cable, and complete any required setup. Investigate controller failure only after external paths and sensor suitability are proved, then perform the monitor-based verification.
Specifications are vehicle-specific. There is no universal oxygen-sensor voltage range, switching rate, heater resistance, or warm-up time for P0142. Sensor design, connector state, exhaust conditions, and test point matter. Do not use a conventional narrowband waveform rule to condemn a wideband sensor or judge all downstream sensors by upstream behavior.
5P0142 Repairs and Typical Costs
A P0142 repair may involve a damaged harness, poor connector contact, a proven signal-path fault, an associated heater concern, or replacement of the correct oxygen sensor. When an engine or exhaust problem contaminates or misleads the sensor, address that cause too. The circuit code alone does not justify replacing a catalyst.
Document the failed test before authorizing parts. A sensor that is disconnected during testing will create additional evidence that must be distinguished from the original fault. On reassembly, protect the cable from heat and movement and follow the specified thread, tightening, and connector procedures.
| Possible path | Current US estimate |
|---|---|
| Circuit diagnosis, diagram identification, and data review | VIN-specific quote |
| Approved connector or harness repair | VIN-specific quote |
| Confirmed Bank 1 Sensor 3 oxygen-sensor replacement | VIN-specific quote |
| Separately proven heater, exhaust-leak, or engine repair | VIN-specific quote |
A VIN-specific quote is more useful than one generic oxygen-sensor price because technology, sensor location, access, and exhaust condition change the work. Ask whether diagnosis, the exact part, labor, any required setup, taxes, and verification are included. The listed repair paths are alternatives rather than amounts to combine automatically.
6Using iCarsoft CR Eagle P for P0142
On a supported vehicle, iCarsoft CR Eagle P can preserve accessible fault records, available freeze frame, live data, and diagnostic reports. For P0142, save the correct Bank 1 Sensor 3 information with companion heater and engine codes so the original event remains available after circuit testing.
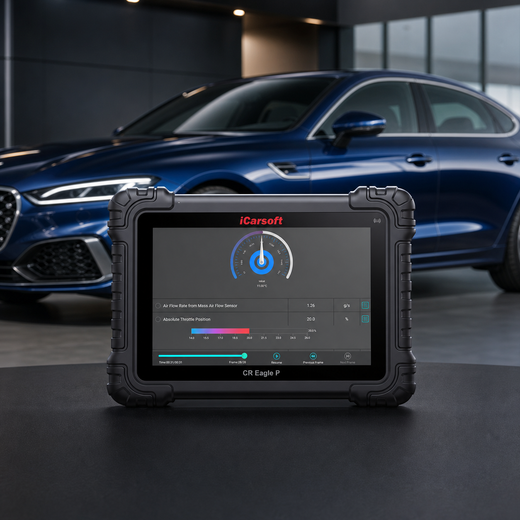
Verify the sensor identity before reading the graph
iCarsoft CR Eagle P
Review supported oxygen-sensor and engine data with the correct units and operating state. Confirm VIN, ECU, sensor labels, and any enhanced test coverage before purchase.
Check current CR Eagle P price and availabilityCheck CR Eagle P compatibility by VINThe official page describes OBD test modes and bidirectional functions, but that does not guarantee every manufacturer-specific oxygen-sensor monitor or heater test. Use only supported functions permitted by the service procedure. A graph can show what the ECU reports; it cannot by itself prove a wire, sensing element, or catalyst is physically sound.
Know the measurement boundary. CR Eagle P does not directly measure sensor-terminal voltage, heater current, circuit resistance, terminal tension, exhaust leakage, or catalyst condition. Use the specified meter, scope, inspection, or exhaust test. Do not mistake a scan-tool voltage display for an independent measurement at the sensor connector.
7Verify the P0142 Repair
Check repaired terminals, connector locks, harness clips, and exhaust clearance. Confirm that the correct sensor was installed and any disturbed joints are sealed. Save post-repair findings, then clear erasable records through the OEM procedure after preserving the original codes and freeze frame.
Run the relevant monitor enable conditions or safely reproduce the original operating state. Check current and pending P0142, associated heater codes, sensor plausibility, and supporting engine faults. One clean cold start is not proof that a warmed-up oxygen-sensor circuit or catalyst-related monitor has completed.
If the fault returns, compare the new status and operating conditions with the original record. Revisit the identified circuit instead of replacing another sensor by location guesswork. Verify readiness separately from warning-light status, and follow the vehicle's actual monitor requirements rather than an invented number of drive cycles.
A permanent P0142 can remain immediately after a successful repair. If the vehicle stores it as a permanent DTC, a scan tool or battery disconnect cannot erase it. Once current and pending faults are absent, the OBD system removes the permanent record only after the applicable monitor reruns and passes.
8Related Oxygen Sensor and Heater Code Guides
9P0142 Frequently Asked Questions
Where is Bank 1 Sensor 3 for P0142?
Bank 1 contains cylinder 1, and sensor 3 is the third numbered sensor in that bank's applicable exhaust arrangement. The physical location depends on the engine and emissions package. Confirm it from the VIN-specific diagram rather than assuming a driver-side or rear-most location.
Does the P0142 code mean replace the oxygen sensor?
No. A circuit fault can involve wiring, terminals, signal or reference paths, and relevant operating conditions. Verify the correct sensor and test the circuit before replacing it. A code reader identifies the diagnostic starting point, not the failed part.
Is P0142 the same as a heater fault?
No. P0142 concerns the sensor circuit; P0147 is the related Bank 1 Sensor 3 heater-circuit code. Heater operation can influence sensor readiness, but its wiring and test method must remain separate from the oxygen-sensing signal circuit.
Can I drive with P0142?
A short light-load trip may be reasonable if operation is normal and the owner's manual allows it. Stop for flashing MIL, severe misfire, unsafe power loss, overheating, leaks, or excessive exhaust heat. The code cannot provide a guaranteed safe distance.
Why did P0142 return after sensor replacement?
Check exact part application, connector identity, cable routing, terminal contact, supporting heater faults, and exhaust or engine conditions. A new sensor cannot repair damaged wiring. Confirm that the relevant monitor ran and that the returned code matches the original event.
Can CR Eagle P test Bank 1 Sensor 3?
It can display supported ECU data and available monitor information when the exact vehicle is covered. Confirm labels and units first. Physical circuit voltage, heater current, resistance, and exhaust leakage require the appropriate external instruments and OEM tests.
The iCarsoft Official Store Technical Team maintains the store's fault-code library. This guide organizes published manufacturer evidence and verified product information; it does not document a hands-on test of a particular vehicle or claim an individual engineer's review.
Technical and cost references
- Volkswagen Jetta and GLI Quick Reference Specification Book — oxygen-sensor DTC chart P0142 through P0147 distinctions; application-specific values are not generalized.
- Jaguar Land Rover LTB00671NAS6 — Engine MIL Illuminated With Heated Oxygen Sensor-Related DTCs Stored Illustrates application-specific post-catalyst Bank 1 Sensor 3 identification; confirm the exact VIN layout.
- Snap-on Diagnostic Trouble Codes (DTC) List Generic sensor-circuit and heater-code wording.
- California BAR — On-Board Diagnostic Test Reference Permanent DTC and monitor-readiness principles.
Product information: Official iCarsoft CR Eagle P page.
Editorial note: This educational guide supports diagnostic planning and does not replace the current service manual, safety instructions, or professional diagnosis for your VIN. Source information was checked August 31, 2026. Apply only the procedures and specifications for the exact vehicle; product functions depend on vehicle, ECU, software, and access requirements.


